PSVR

Posted: October 20, 2016 by ezrawexler in The Big Picture, Videogames
Tags: , , , , , ,

Preorder: I pre ordered the psvr the first day it was possible to do so. I got to my local ebgames early, maybe an entire hour before it opened, thinking that the excitement I had would be shared by a gaggle of people. I expected to stand around in line discussing my hopes and dreams for psvr with other pre orderers. Instead, I spent an hour standing around a very quiet mall, smiling and nodding as elderly folks did their morning mall laps… (yep, that’s a thing.) When the store finally opened the staff explained that the preorders were not actually starting for another 90 minutes because they had to happen at the exact same time as wherever. I suggested they give me a number so I could go get a coffee, so they printed out some receipt paper and wrote a “1” on it… After drinking coffee and wondering why the heck I hadn’t brought my 3ds with me for an hour, I headed back over now expecting to see a line up that I would waltz to the front of. Nope. Nothing. No one. Just the usual shoppers, which at ebgames on a weekday morning means no one. Finally, the time came, there was still no line, and I preordered my psvr bundle, apparently first, and maybe only. I sent a txt to my two friends that were preordering also, and they had secured theirs online (amazon, best buy) and I wondered why the heck I hadn’t just done that too.

Waiting & Wondering & the PS4pro: Waiting sucks. I’ve never been good at it. But waiting for something that you only have an inkling as to what it will be like while everyday looking online for some information and still finding sadly nothing is worse. Worse than that? Learning that Sony is also launching a bigger and better ps4 about a month after the psvr that may or may not improve the psvr experience that you still have a very vague sense of what it will be like. I was left to wonder, apparently along with a lot of people, whether the psvr was worth getting before the ps4pro launches. And of course, getting both is a lot of money in the video game sphere, and there was still the process of trying to figure out which games to get on launch day. Will it be good? Great? Worth it?

Demo Day: I got an email from ebgames that there was going to be two days of psvr demos that would give me a chance to actually try the system. AMAZING! I arrived at opening to the store that had advertised the demo expecting there to be a line of people jumping up and down in anticipation. Nope. Store opened. I look around. Nothing to see. “Where’s the psvr demo?” I asked in as casual a tone as possible. “Hm?” the staff asked. “When is that supposed to be?” I pulled out my phone and without exploding showed him the email from ebgames. “Weird,” he said “no one has mentioned it.” He called another store. “Oh, it’s going to be at the Young street location around lunch time.” I think my eyelid twitched. “Ah, cool,” and off I went. Turns out that it had been going since opening at that store I learned when I arrived there at noon. I was the 5th person to try it out according to the sign up sheet. As I was signing up a guy was trying out the underwater adventure. His daughter was watching him and looking excited. I watched the screen and thought “Hm, the graphics look pretty dated…” When he was done and the psvr was off his head he looked at his daughter and said “That was amazing. Your turn!” The demo guy asked her how old she was. “Eleven,” she answered. “Sorry, no go, got to be twelve.” She ran from the store crying. The dad got up and ran after her. My turn! YAY! I had chosen Eve: valkyrie as it looked like far and away the best thing to try. It was awesome. It wasn’t complicated to put on and get a clear image. I could look around and see out of the sides of my ship! There was an amazing sense of depth. The graphics seemed a lot less important all of the sudden in light of the experience itself. Sold! I defiantly wanted to have this! My wife, who plays plants vs. zombies on her tablet and that’s it, was meeting me for lunch, so I signed her up to try the underwater thing. She really liked it, and afterwards told me that she could see why I was excited about it. Nice. (In retrospect I wish I had asked the guy why twelve was the minimum number, but I suspect he would have just told me that’s what he was told.)

More Waiting?!: Too much time elapsed during which I spent a great deal of time reading about cinema mode and wondering how good it would be. I have a 104” screen as I use a projector, so I was very curious if this would be a good substitute for the largeness if I chose to sell my projector and get a smaller (60” maybe?) 4k TV to give further credence to my desire to also get the ps4pro.

Game preorder: I finally decided on Eve: valkyrie, Battlezone, and RIGS. With VRWorlds and the demo disc bundled I thought I’d be fine with just Eve, but my friend was excited for RIGS, and I got myself excited for battlezone, so that was that.

LAUNCH!: I showed up at the store about thirty minutes before opening figuring I’d be the only person there. I was actually second behind a lady picking one up for her son. I told her that I thought that was very cool of her. She said she didn’t know a thing about it. Store opens and we make a line. Turns out that her son hadn’t preordered it, but no problem, there were units available. She had no idea if he wanted the bundle, and what games. There was a lot of texting and waiting, and texting, and waiting, and more waiting! Seriously?! GAH! It took her almost twenty minutes to find out he just wanted the headset and no games. Finally, my turn! Guy puts the bundle on the counter. No games. “My games?” I ask. “Oh, we haven’t got any copies of Eve yet.” “Really? Well, I also ordered RIGS and Battlezone.” “Oh? I don’t see that here. We didn’t get in any Battlezone either. We got in one copy of RIGS though, but it has already been gutted, so let me grab it for you from the shelf.” Nice. To Bestbuy! (Man, I really should have just ordered from Bestbuy. My buddy who did got his in the mail a day early!) They had tons of copies of every game for psvr launch at Bestbuy. Nice nice.

Work?: I had to go to work with my psvr in my trunk. I did my best to focus and stay on task and not daydream… “See you tomorrow!” I said as I scooted out the door many long hours later.

Setup: Setup was incredibly easy. Everything was numbered and the instructions could not have been any larger. Twenty minutes and I was playing.

Playtime!: My friend who got his a day early had actually decided he was returning it as he has a car hobby that needed the funds more, so I invited to come over to my place for a launch party! We spent the evening trying out all 3 main games, and a number of the demos. All in all we were both impressed by the time midnight rolled around.

Kids: I have a 7 and 9 year old who have now had about 5 10-15 minutes experiences with the psvr over the past week. They really like everything the playroom vr has to offer, and also find the launch menu environments in eve and battle zone neat to see. My kids really liked the job simulator demo and want me to get the whole game. (Apparently Dan TDM the Youtuber had an episode about it on another vr set a few months ago and it was great…) Neither of my kids have had any problems with their short play sessions other than the getting the headset on and off part. Also, when standing for some experiences I feel inclined to stay close as there is that long cord to potentially get wound in. They both think the psvr is amazing and are looking forward to trying the battlefront vr dlc. (I spent a fair bit of time trying to figure out why Sony doesn’t want under 12 playing with he psvr, but the best I can see so far is that a lawyer told them that was a good age to set it at…)

Simulator/VR sickness: I have only had one real experience with this, and it was this past Monday after getting about six hours in with he psvr the day before, and most of that time was spent spinning through space in Eve. I did’t feel bad at all on Sunday. It was the next day that I felt off. Not dizzy. Not nauseous. Just off. Like off kilter… especially when I was working at my computer. I felt like I was working on a diagonal. It went away by mid-afternoon. I chalk it up to too much too soon, and haven’t had the sensation again. Of course, I also haven’t played the day away again either… (But I will, oh yes, I will!)

Games: Well, I’ve mentioned Eve at least six times already, so you won’t be surprised when I say that so far I think it is the best game on psvr that I have tried. The levels and lack variety, and there are only four class of ships to check out, but the gameplay is an amazing experience that really feels like something new. RIGS is extremely cool, but a little too sportsy for me. Also, a lot of the people I have played with sound like pretty serious sportsy bros, which brings out my desire to play a cool jrpg in vr even more. It’s a neat experience, but I would rather if it was a robotech/mechwarrior game… Battlezone is very smooth and arcadey. Easy to jump into and get playing, and because it all takes place on a flat plane, easily the least disorienting for getting used to vr gaming. It’s a bit repetitive, but the multiplayer works really well and everyone seems to be chatty while playing it. Also, I should mention that on VRworlds there is a pong like game where you use your head to bounce the ball back and forth with AI that is extremely fun. My 7 year old loves it.

Configuration: I have noticed that the alignment of the games does seem to slide out of alignment with my forward facing, but luckily you can almost always hit options on the controller and have the visual field recenter. I have spent some time trying to figure out why it get unaligned, and am still experimenting with light levels in the room, my distance from the camera, and calibrating the vr headset itself though the utility tool. So far nothing has been a complete fix, though I have noticed that things seem to be generally more stable (less jitter, less drift) when there is only a lamp on in my windowless room.

Grease: I want to mention that the psvr comes with a nice microfibre that I have been getting way more use out of then I ever would have expected. I find that I have to clean the lenses after every single use of the headset, and sometimes between matches in a game. I don’t know if it is condensation from my body head getting trapped, or oil from my eye lashes, but I had never even considered that the psvr would have these glass screens that need constant attention.

Cinema Mode: It’s good. Not great. Not a projector replacement. I watched the first twenty minutes of the force awakens on a simulated 225” screen and was impressed. I tried fallout 4 on the same and felt like everything looked muddy. Still curious if the ps4pro will improve this mode…

Week one is over: Tomorrow I will have had the psvr for a week. I have probably spent somewhere close to sixteen hours with it, and am still thrilled every time I get it on. It is hard to explain how neat it is to be inside a virtual environment and experience it. The games aren’t amazing, but the context is. I’ve always liked 3d movies and games, and this is a whole new level. I’m really looking forward to Farpoint! (I’ve always been a “light rails” sucker, but vr light rails?! YES PLEASE!) (Also, I am really hoping for a vr remake of that terminator arcade game… oh yes.)
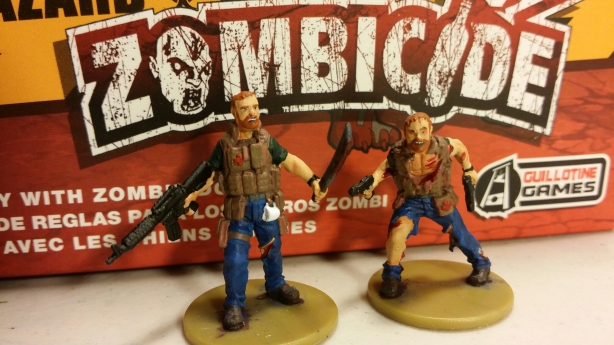
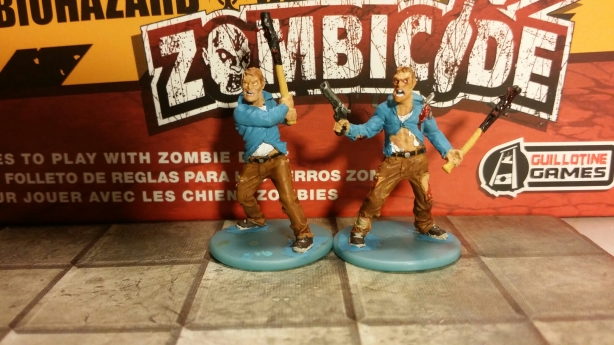
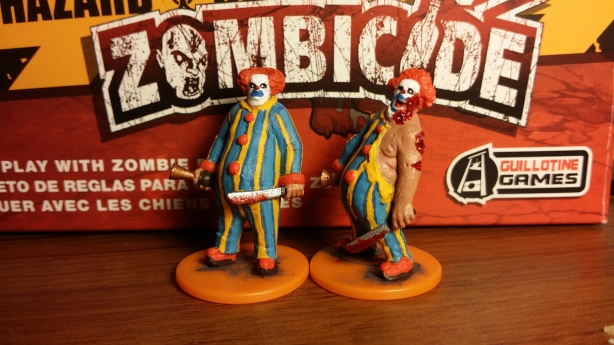
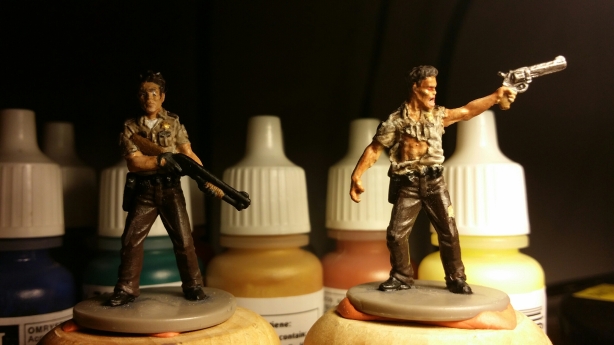
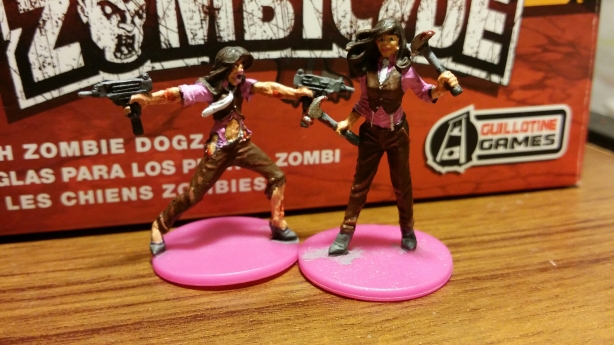
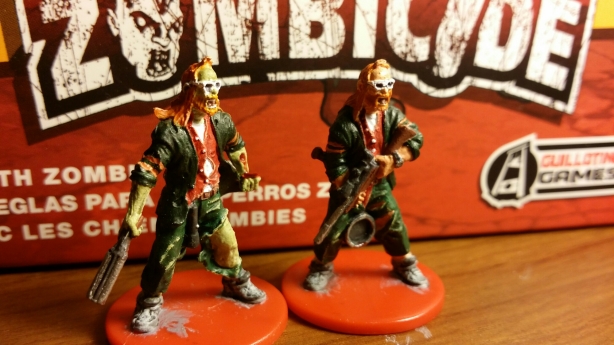
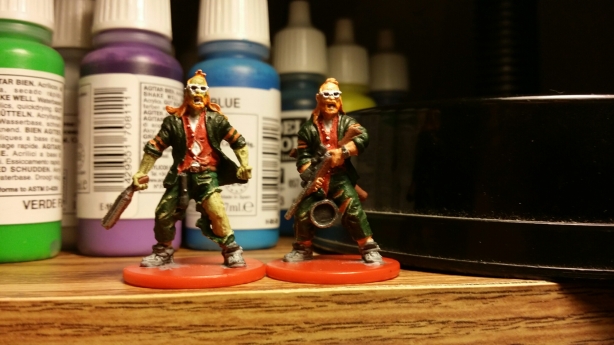
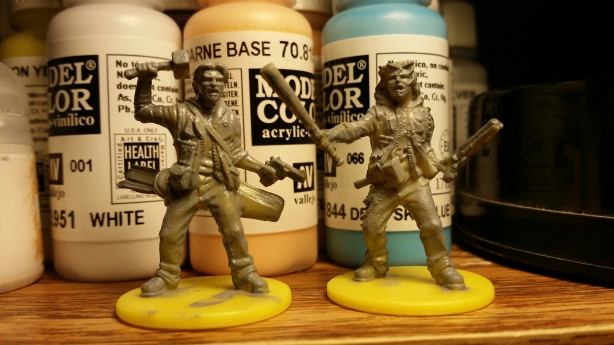
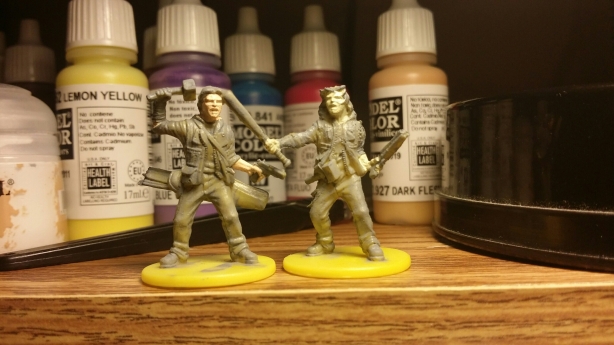
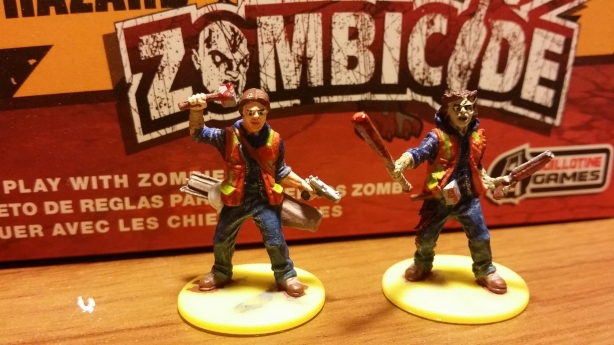
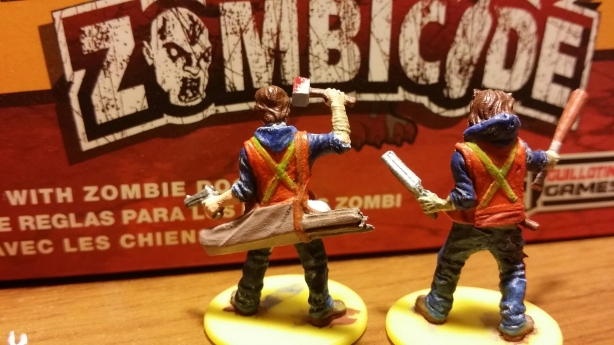
Well, I’ve been painting, but not writing, for quite  a while now. Thought it might be a good idea to show some of what I’ve been doing to be “up to date” as I prepare to move into some of the Zombicide expansions. Not that I have completed all of the core game yet, BUT THOSE TOXICS ARE CALLING TO ME! Anyways, here are the models I’ve been painting recently. 

image

image

image

image

image

image

image

Well, these aren’t in perfect order as I painted them, but looking over them I can appreciate what I’ve learned and discovered over the course of these models. Probably the single biggest lesson is to “just try stuff” and not worry too much about “the end result.” Also, on a more technical note, eyes are important, so even if you have to keep starting over, they seem to be the single most important thing to get “right”.

Looking forward to getting those toxic zombies next. Maybe I’ll even stay up to date with the blog for a while…

Ezra

Q. Why did you pick up Destiny in the first place?

A. Bungie, i.e. Halo. I love me a good sci fi shooter adventure with a fun pvp chaser. Along with millions of others, playing the Halo series has been a cornerstone of my gaming experience on consoles. The campaigns were generally fun to play, especially with friends, and the pvp is shooter bread and butter. It has never tired to be a shooting “simulator” type, more of a frantic jumpy jumpy sci-fi death sport, and that’s what I enjoy.

Q. Is Destiny what you expected?

A. At first I would have said the answer was “Yep, this is a sci-fi fps campaign and pvp bundle that is a lot like Halo.” After a few sessions with the campaign though, I started to wonder why it was so repetitive, and why the plot was so bland. The pvp seemed solid, but with hardly any variety in match types it seemed generally lacking too. The graphics are great. The sound is wonderful. However, after a few days my impression was, “hmmm, I’m finding this a bit boring.” Also, I thought it was interesting, and kind of weird, that you took into the pvp what gear you had accumulated from the campaign. It was at that point that I realized that this was something pretty different from just “Halo with a different name.”

Q. Did you like the Campaign?

A. To be honest, at first I was just playing through all of the story missions since I had not yet figured out that tackling the campaign was no more “important” or “unique” than just doing patrol, strikes, or crucible (once everything was open that is…) While the variety of the planet environments was nice, the actual story was pretty basic and unexciting. But did it matter? No! Because this is not a plot driven fps, this is a loot grinding journey of both stuff and skill amassing. The goal is not to uncover plot twists. The goal is not to watch (or even guide) the characters through ethical dilemmas. The goal is not even to “finish the game.”

Q. So what’s the point?

A. The point is the loot! The point is to get that new armor… That new shader… That new ship… That new gun! The point is to see someone in the Tower and to check out their gear and want it too! Exotic weapon?! Cool! Fancy emblem?! Awesome!

Q. So Monster Hunter?

A. Yes! This is a game for people who like to do the same missions over and over and over in the hopes that THIS time they will get a slightly better helmet with more light. It can be fun to play the pvp as pvp unto itself, but the real goal is to clear bounties, so as to advance your cult status, to unlock cooler gear, to head back to a strike and complete it on a harder level, to get better drops, to get better gear, to head back to the tower and eventually be the one that causes the multitudes to dance out of excitement for how awesome your stuff is!

Q. So, do you think the future DLC will bring exciting new monster types and landscapes?

A. Who cares! As long as there is a raise to the level cap and new gear I will be there!

image

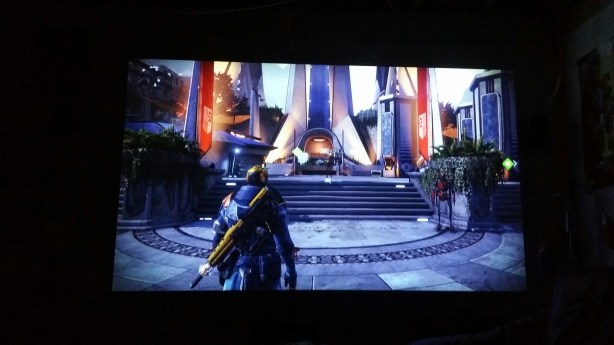
(That’s me with my game ending reward rifle standing at the tower hoping someone will notice…and start dancing!)

image

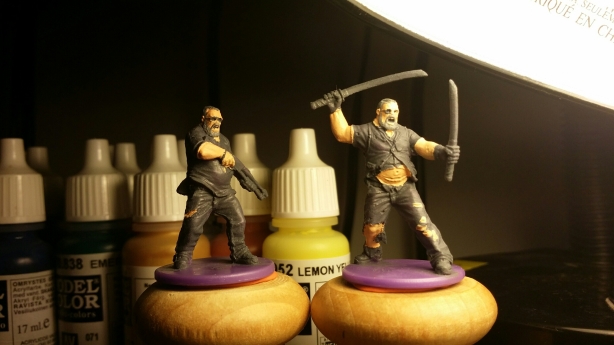
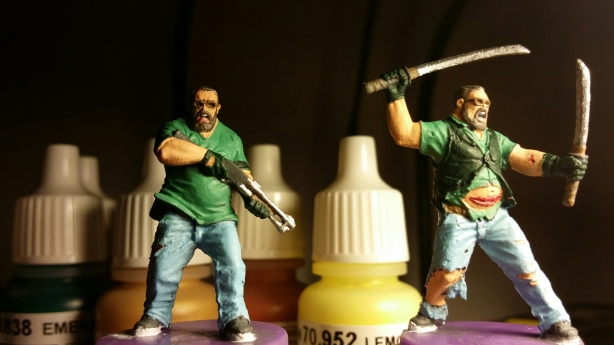
Joshua is one of the more consistently useful, and therefore used, characters in the zombicide game. The models are pretty sweet too. The only real oddity here is that Z-Joshua seems to have put on a vest at some point. I guess even in the heat of surviving fashion still has a role to to play! (Or maybe he just couldn’t find a coat large enough to fit around that belly?)

Step 1) Gesso. I paint on a very thinned darkened gesso to ensure that the paint will stick and stay.

image

Step 2) Add base colours from the “inside out”. In other words from skin I move in layers outward adding the base coat colour.

image

Step 3) eventually all of the colours are on. Then I start looking at some of the details. A big one here is the wound on Z-Joshua’ s belly. I added relish tones to the establish flesh tone to get a few shades of wound that I applied darker to lighter from middle to edge.

image

image

Step 4) Once details have colours I like to move on the shades, highlights, and textures. A big focus here was to make the vest and gloves leathery (applied glazes) and the jeans more like actual denim. That took adding a very dark wash over the entire pants area and then dry brushing lighter and lighter shades with a dry brush, trying to get the lighter shades on less and less of the raised edges.

image

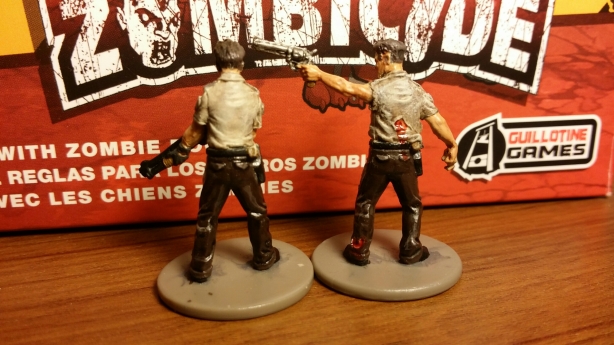
This next picture is not a step, but I wanted to show my work area along the way. Lately I’ve been using plastic sheets for my palette and quite like it. Here you can see that my water is very green. I like to refresh my water between colours to ensure I get what I was looking for colour wise. The magnifying glass is cool, and has some LED lights on it. I only use it on faces and other tiny bits. (It’s a whole other skill to paint where your brush and area are magnified, and we’ll worth trying when needed.)
image

Step 5) blood. I’ve been happily using “blood for the blood gods” from citadel. It’s goopy and a nice colour. I tend to apply it pretty conservatively on sword edges and wounds, but that belly wound looked pretty bad so I really got it on there. I apply it in strokes in the direction that I think it would ooze…
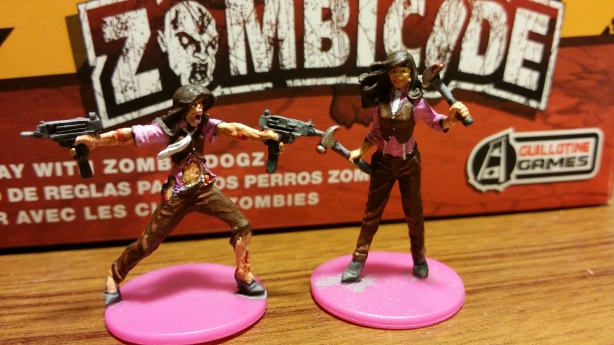
Conclusion) And that was it. As always I can see some improvement, and really enjoyed the relaxing nature of painting. I listen to music while I paint, and while paint dries I read comics. All in all a good way to pass the time! Hope you found this little photo log interesting or useful.

A thought) I mainly started logging my model painting when I saw that very few “noob” painters were showing off their stuff. Six months in I may be verging on “intermediate” but it can still be intimidating seeing some of the incredible paint jobs out there. My hope is that my journey will motivate other new painters to stick with it and share. My experience has been that others are more than happy to give helpful feedback, tips, or resources. It’s a great community, and it is very satisfying over time to see your work improve.

Til next time!

image

image

image

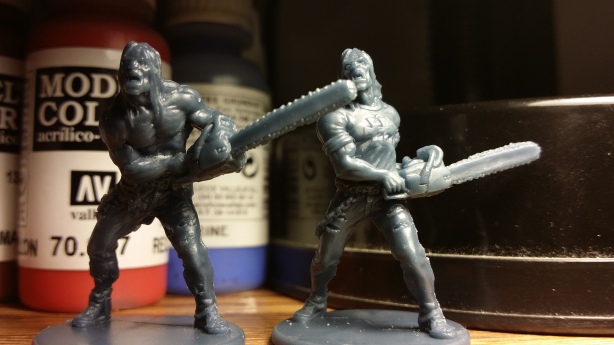
Funny enough I painted Grindlock a few weeks back, but jumped so quickly into my next models I didn’t even think about logging it.

image

As always I started with painting on an undercoat of gesso. Note that at this point I was still using a lighter shade of grey, and have since taken to using a darker shade. I find that a dark grey can sometimes be left in the tiniest sliver in the recessed joints between colours as a lining guide for later.

image

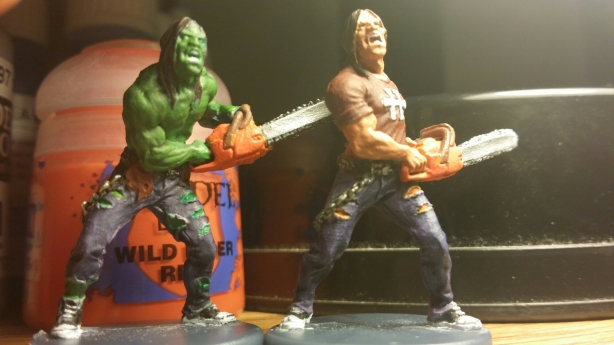
I thought it would be fun to make the zombivor green. I had just watched Avengers…

image

Ironically the blue jeans slowly turned purple as I applied the layers. I must have subconsciously been going full Hulk!

I painted the chains on his pants and on the chainsaws black, and then went over them with a silver drybrush. The result gives the chain areas the aort of depth that makes a feature of them in the end.

image

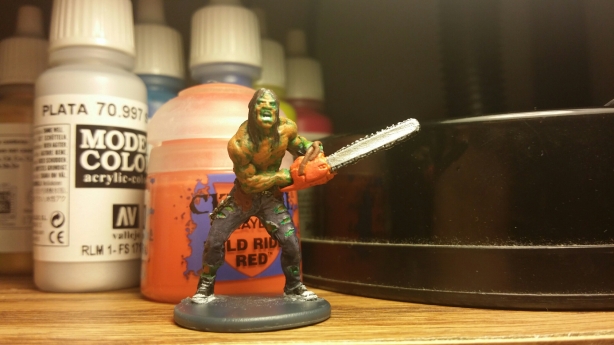
I soon decided that the green was too much, and took to making something different of it.

image

After a black wash to make it darker I used some flesh tones in patches over his skin, aiming for a peeling off into patches sort of look.

image

image

image

I applied another wash over the flesh… this time green.

image

Next I took an even lighter green and did another dry brush, this time using a larger “dry brush” from GW. This step was approached like applying a camo, or patchwork look. I was picturing a fetid mossy fungus that would have been growing on a zombie this far gone.

image

image

I finished off the models with some blood in the cuts and along the chainsaw blades.

Paiting these guys was a lot fun, and the first time I really deviated from the art work of the survivors/zombivors from the game box. It was liberating. Generally I’m keeping to the game art for colours simply for easy recognition for players, but I figured this was an opportunity for something different. Glad I did!

image

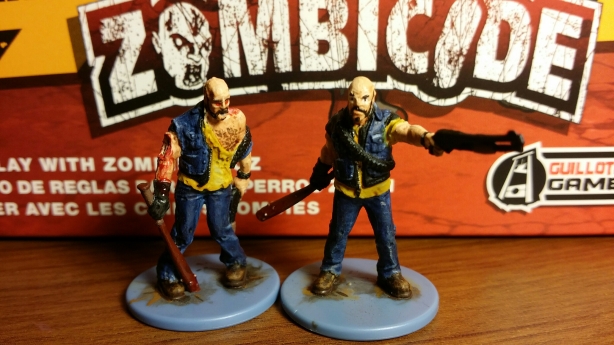
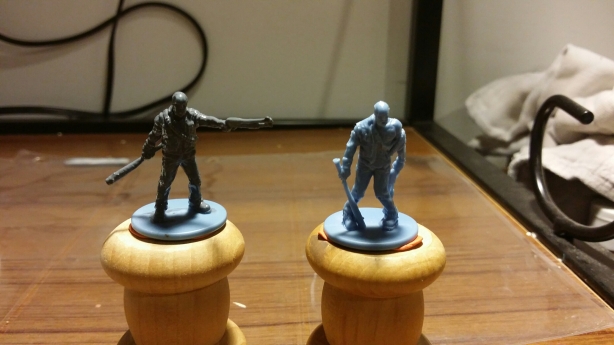
1) Affix the models to something you can hold and manipulate around in your hand. I’m using some wooden spindles and ticky tacky.

image

2) Get the gesso on the model. I’ve been using a very thinned and darkened gesso. Takes two coats, and leaves a nicely covered and still well defined model to work with. I would say that this is the most important step to do properly in order to end up with a model that has all the details showing and a surface that paint will adhere to evenly.

image

3) Using thin coats (as in thin your paints!) of GW model paint I get an entire layer of colour on the entire model. I start from the skin and work my way “out” at each step so it is easier to touch up any mistakes.

image

4) Add some depth by glazing or washing your colours with something a notch darker. Here I had “washed” the blues on the model on the right but not the left.

image

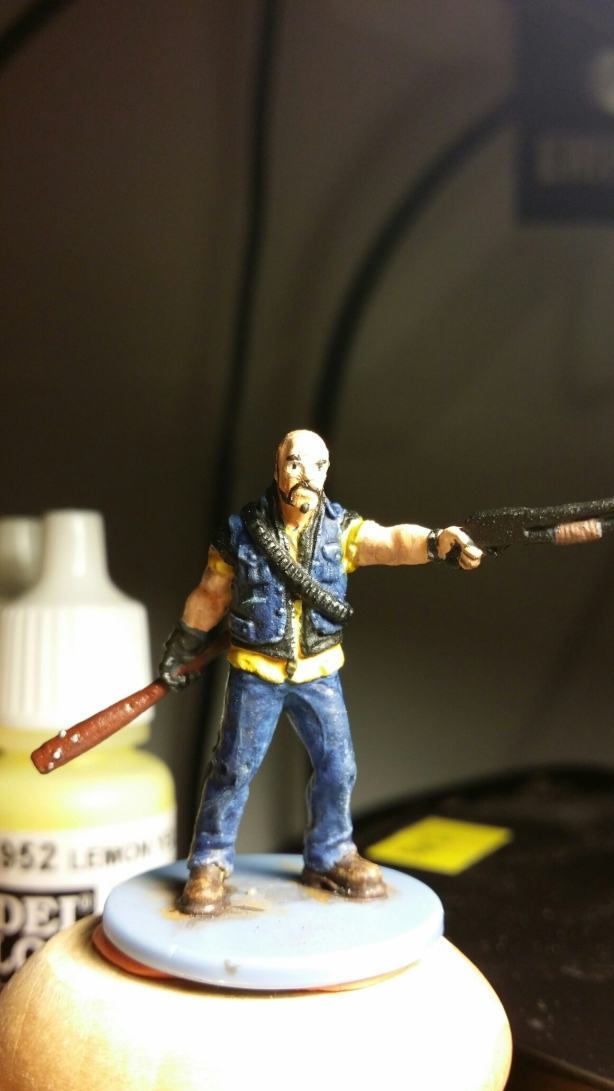
5) For each colour or area I then slowly build the colours back up with progressively lighter shades. I used a dry brush technique on the jeans, followed by some subtler and brighter highlights along the areas where I have identified that the light would hit consistently across the model. For example, the top of the head, or an outstretched arm will be lighter than the front of the neck or the bottom of that arm…

6) Once shading and highlighting has been done everywhere I move to the detail work. (Note that applying the highlights over the shading is probably the second most critical step to the paint job looking good at the end, and should not be rushed.) On these guys the details were the zippers, the nails in the bat, the fleshy bits around wounds on zombie Mitch, and of course the eyes.

image

The last step I did here was get some gore on the bats and the wounds. I find that this is usually a case of less is more, though with such huge gaping wounds I felt inclined to do a bit more than I usually would.

Also, this was the first time I painted a model in very short bursts. I never sat with these for longer than an hour at a time, and more often only half that. I found that it kept me very task focused and overall fresh whenever I was painting. In the past I have sat and plugged away for hours on end, but after this experience think I’ll more often paint in bursts. (Or at least have a series of models on the go at once that I can move back and forth between.)

Well, those are the steps I followed. Enjoy!

image

image

image

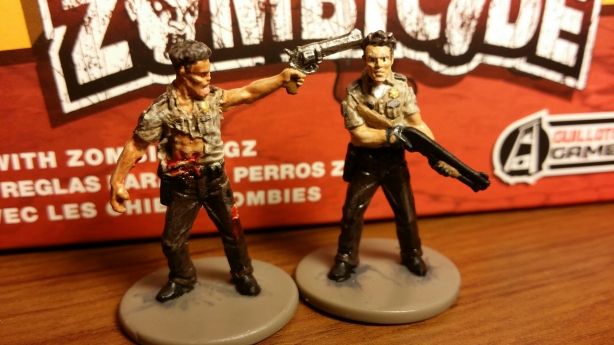
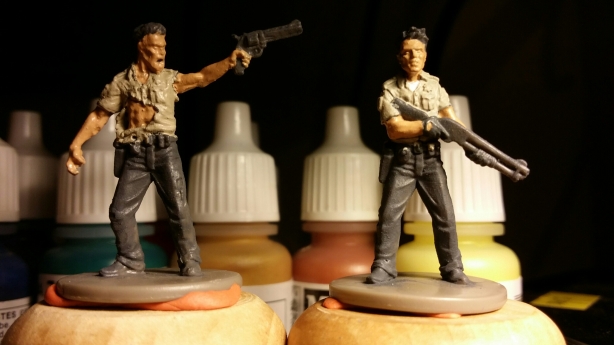
To prepare Phil and Z-Phil I decided that my gesso that I had been using was too light and too thick. I darkened it with some black paint, and thinned it down considerably with an thinner I picked up at the store rather than water. Though it took two coats, I was much happier with the retention of detail, and the nice dark shade. (I had considered picking up an airbrush and doing what I see in a number of how to videos but my painting space is not well ventilated enough… yet! I plan to install an exhaust fan above my paint station).

image

Having recently discovered the importance of thinning paints, I carefully started with the flesh and worked my way “out” with the base coats. Here you can see I had done the flesh, undershirt, over shirt, and gloves.

I really wanted the shirt to be the right colour as it is pretty distinctive. It took some trial and error, but once I was just a smudge lighter on my pallet than what I wanted to end up with I felt I was there. (I’ve also learned that everything just gets darker and darker as it first dries and then of course with subsequent shading…)

For the gloves I went with a dark grey that I layer glazed with GW’s black wash, Nun Oil. I’m happy I did not just paint them black as the end result is that the gloves look more leathery than the gun stock which was just done in back with a black glaze.

image

I carefully put a few details on the shirt, and for the first tried out some gold paint for his badge. I used some dry brushing and gradual highlighting especially on his pants.

Unfortunately, I went back over his pants with a dark brown wash a little too thickly and rather than a smooth blend I ended up with leather looking pants. One of my friends commented that it’s okay cause now he looks like he might he one of the village people. I’ll take it. Always more to learn!

image

image

image

I had wanted zombivor Kim to have pinky and purpley skin. I started with a nice light mauve, and thought I was off to a good start.

image

However, when I started adding the other colours to the model it started to look less than stellar. At first I tried to change the colour to a more classic purple, but with the brown and pink it was just too many clashing shades.

image

Well, once I decided to just do both models with the same tones everything came together. I enjoyed the few highlights, and am happy with how her hair turned out.

image

My biggest lesson here was affixing the models with ticky tacky to something grabable. It makes a huge difference to the whole process, making it much easier to check the model out from any angle.

image

Still lots of room for improvement, but with each model comes more learning, and the whole time is pretty fun.

image

One thing I really notice as I gain experience painting these tiny models is that patience is a serious asset. You really can not rush from task to task because paint only dries so fast and also, slow makes for steadier strokes.

On this model I had the opportunity to do some different detail work, like the stripes on the jacket. I made one thick line and then cut it with the background colour down the middle. The challenge of course was that the lines are not perfectly straight since the jacket is not perfectly straight. Working with the contours of the model is a very interesting process…

image

As is using the gesso over the brightly coloured plastics! This picture above is after two thin coats. I decided to not add a third as I did not want to obscure any details. It seems to have been enough coats to keep the paint nicely adhering to the model.

image

Here you can see how I move along from piece to piece, or colour to colour back and forth between the two models. At this point I had not done the weapons, the pan, the flashlight, or the glasses.

image

By this point I had done a lot of the fine details in basecoat and some layers, but not the finer highlights. Also, some wash had been applied. To keep the jacket and pants distinctly different greens I washed the coat with a brown, and the pants with a green. It’s subtle, but did have some impact.

image

Here I had added some highlights to a few key spots, and had touched up the glasses and made the hair more layered. Once everything was dry I finished it up with some blood details, and decided that these glasses are sunglasses, cause try as I would I could not get anything to look like eyes behind them. (If only they had been a seperate piece to glue on after!)

Well, that’s Ned.

image

image

As usual I started with cleaning the model up and then painting it with some very thinned grey tinted gesso.

image

I decided that unlike with Wanda and her Zombivore where I used the same flesh tones on each, this time I decided to go with a much more green tone on the infected.

image

image

image

Soon I had my first experience with some florescent model paint, and I wasn’t very happy with the consistency. Goopy! This led to my first experience with packaged thinner from Citadel, which really helped.

image

I wasn’t happy with the colour of the pants, so I lightly added another, creating something more satisfying.

image

I added shades and highlights and finally details.

image

image

I included a lot of pictures to show how much things come together as you move along. I find that there are many points along the way where I wonder if things will come together, but as long as I follow the pattern of techniques that I am practicing things seem to work out. I see some progress from project to project, and really what more can you ask for?